Tuesday, November 27, 2012

Beginners Guide to WordPress: Setting up a local site, Setting up a working development environment, Gaining practical skills and Developing understanding

Before we move onto the central theme of this article, as a foundation to our knowledge I suggest you read this article which outlines the different versions of WordPress that are available: http://lorelle.wordpress.com/2005/08/27/wordpress-versions-how-many-and-whats-the-diff/

As individual developers we are concerned with the full version of WordPress.  For individual developers that are learning their trade or who need access to an environment where they can experiment and practice without the additional issues of acquiring web space and a web server we need a local web server installed that will replicate the online web space where WordPress would normally be housed. There are a couple of solutions listed below. I suggest you try out both options i) to see what environment you like working in the most and ii) give you the opportunity to work on a couple of WordPress sites as you experiment in the future.

·         Have a read of section 1 for some background to the technology
·         Try both implementations in section 2. You may want to go to section 3 before you start and download WordPress. Instructions will then be given in section 2 on how to install this onto your local web server.
·         Section 4 will give tips on using Dreamweaver as your development environment. If you do not have Dreamweaver links to other options are provided.
·         In section 5 we get down to work by creating a WordPress theme.
·         Section 6 Plugins, you will not really need at this stage, but it is there for future reference
·         Section 7 offers some thoughts on development Strategies, Environments and Tools
·         Section 8 offers links to websites that can help with the development of individual LAMP technology programming skills.
·         And in section 9 some other useful resources are listed.

I. Background to the Technology

II. Setting up the Local web server Infrastructure (XAMPP)
2a. XAMPP Home http://www.apachefriends.org/en/xampp.html (This link is for an overview of product)
3a Download XAMPP (v1.8.1)  http://www.apachefriends.org/en/xampp-windows.html  (includes Apache web server v2.4.3, PHP programming language v5.4.7 and MySQL database v5.5.27 and phpMyAdmin 3.5.22 : (probably best to use the installer option. Note also there is Lite version for use on USB Sticks)
4a How to Setup a WordPress Development Environment for Windows (XAMPP): http://wp.tutsplus.com/tutorials/how-to-setup-a-wordpress-development-environment-for-windows/
OR
II. Setting up the Local web server Infrastructure (WAMPSERVER)
2b WampServer Home http://www.wampserver.com/. (This link is for an overview of the product. The product is made by a French company, use the ‘ENGLISH’ text link on the home page to translate the page, not the browser translate option if prompted.)
3b DOWNLOAD WAMPSERVER 2.2E. From the Home page there are a range of installation options depending on your computer and the specific versions of Apache, MySql, PHP and phpMyAdmin.
If you intend transferring an existing php intensive WordPress site into this setup it is probably best to match your existing versions.
You get the choice of 32 bit or 64bit depending on your machine. You can find this out by looking of the properties of your ‘computer’ or ‘my computer’ icon on your desktop (right click).
When downloading you will be presented with a form to fill in(for training) – you don’t need to fill this in, you will find a link to download the file at the top of the page. I went for this version (64-BIT & PHP 5.3) as it matched my machine and the PHP version matched a WordPress site I was transferring in.
4b. Setting up a local server for WordPress development (WAMPSERVER): http://www.webdesignerdepot.com/2012/02/setting-up-a-local-server-for-wordpress-development/

III. Installing WordPress
5. Download WordPress: http://wordpress.org/download/

IV. Working with WordPress
7. Setting up a PHP Development Environment: http://www.adobe.com/devnet/dreamweaver/articles/setup_php.html The article gives a comprehensive overview which includes installation of XAMPP and myPHP admin as they are critical to being able to progress when setting up your Dreamweaver development site. Instructions included for both MAC and windows users.  If you have already installed XAMPP you may just want to review the instructions. The Dreamweaver action kicks in with the section “Defining a PHP site in Dreamweaver CS5” and finalises the whole download , installation and development setup to get you ready just to focus on the development of the WordPress website.
8. Other Development Environment options include:
·         WordPress development with Netbeans IDE: http://www.dev4press.com/2012/tutorials/wordpress/wordpress-development-with-netbeans-ide/
·         Sublime text 2: http://www.sublimetext.com/
·         Webmatrix: http://www.microsoft.com/web/webmatrix/
I have not used any of these but all have been mentioned in dispatches as useful development environments.

V. Getting to Work – Themes

VI Getting to Work – Plugins

VI DISCUSSION – Strategies, Environments and Tools

VII Skill Development
17. PHP 101: PHP For the Absolute Beginner: http://devzone.zend.com/6/php-101-php-for-the-absolute-beginner/
18. CSS Tutorials: http://www.csstutorial.net/
19. JavaScript tutorials: http://www.pageresource.com/jscript/
20. jQuery Tutorials: http://docs.jquery.com/Tutorials  (About jQuery: http://jquery.com/)

VIII Useful Other Resources

Friday, May 25, 2012

Camtasia 7.0 Part 1: Key Preparation

This post is the first in a series that will shed light on my approach to developing a videocast. In particular what i would call a video 'infocast'. This post mainly draws on my experience of developing a set of videocasts that introduce students to 'online and distance learning' (See parts 1,2,3,4,5,6) at the University that i work DMU.
preparation
Photo Courtesy of elibrody under the CC BY-NC 2.0 license.
To ensure that you do not waste unneccesary time, there are six key things you need to do before you embark on your project. These are:
1. Split your project up into approx 5 minute videos. There will be research around that indicates that 5 minutes is at the outer limit of time that people will set aside to concentrate on watching a videocast. In my own particular project I ended up with about 6 videos. One video did stretch to 7 minutes, but i personally think in the context of 5 other shorter videos of between 2-5 minutes, then slightly breaking the rule but keeping the breaks natural was ok to do (I say - follow guidelines but don't be afraid to break the rules). 2. Store and Work on a USB Memory Stick. One of the few poor things about Camtasia is that when you add Media to the project it only refers to the media using the original absolute file path and location. If you wish to move your folder somewhere else or if you want to work on your project at home and also at work you will have to re-find the media everytime you change locations before you can start working on the project. To get around this problem you need to store all your work on a USB Memory Stick, keep a consistent folder structure and make sure that whatever machine you work on assigns the same drive letter to your USB Stick. This article explains how to Assigning a Drive letter to a USB drive. For me as the work machine forced me to use a G:/ Drive, I reassigned my own drive at home to match up and ensure i could work on both machines with no problem should i have to.
3. Set up a clear working folder structure. There are lots of different types of files that may be used when developing a Camtasia project. In order to work in a methodical, stress free way it pays to get your working folder structure clearly organised before you start. In the Development of this series of online and distance learning videocasts my preferred working methodology was as follows:
A. i) Create a "_Camtasia projects" folder to save the project file and any iterations thereof. ii) Create a "_Final outputs" folder to store the many variations of output that you may experiment with during the production process e.g. 480x360px screen size versus a 320x240px. iii) Create a "_Powerpoint storyboards" folder to store the powerpoint file (and any iterations thereof) that i use to build and develop my ideas. iv) Create a "AA Finalised projects" folder to store the completed series of videos that will be ready for distribution. v) Create "audio, images and video" folders to store the various media that may be used and finally vi) Create a "transcript" folder to store your transcripts and vii) Create a "caption" folder to export finalise audio text captions for use with closed captioning.
B. Plan and map out the sequence of the video using Powerpoint. This allows me to use individual slides (save as > other format - jpg files) as graphic images in the videocast and for me to use the notes section of a powerpoint slide to write and then perfect the initial audio transcript. I can print the slides (publish > create handouts in microsoft word) with the transcript for reference when delivering voiceover narration.
C. Develop and use Other media (audio, video, graphics) as appropriate and save in clearly labelled media folders.
D. Experiment if necessary by producing a final output to the "_Final outputs" folder. This a test folder to see various output options in action.
E. When final output format is finalised then save in "AA Finalised projects" folder.
4. Use Audacity to create and Edit Audio narration files. You can record audio narration files quite happily from within camtasia (saves in a .WAV format). Audacity is just very quick and easy for recording and editing short narrated files. Additionally you can output in the .MP3 format. (although you need to install an extra file - the LAME MP3 Encoder). You can get away without audacity but i consider it a tool that makes your development easier and gives you more flexibility (you can use with other applications, once you know how it works).
5. Settings for best quality video on youtube This article explains in depth how to prepare video for youtube: How to Make YouTube Videos Look Great. The key thing seems to be to use the 16:9 ratio and set to dimensions that are equal to 480x360 or same aspect ratio, as youtube finalize videos at 480x360px. Especially if I need to do screen capturing I now tend to use 960x720 to keep the ratio the same (but i did not do this for these videos). Note: I am still experimenting with this and have not come to a definitive view on what the best strategy is, but at this time this is my position.
Late Update
6. If recording is slow Disable Display Acceleration During Capture. I noticed that initially especially with PowerPoints capturing a screen recording can be very slow. by disabling the display acceleration during capture recording speeded up dramatically. Read this link on How to Improve Recording Performance for a full explanation and other related tips.
So this is an insight to one particular project that I have worked on - there are other ways of using camtasia, but hopefully this gives an initial idea of the things to think about when setting up. note: looking back I will probably review my naming conventions - the underscores and "AA" in the folder names was to keep these folders together away from the media folders, so that I could find the media folders more easily when in the middle of working.

Saturday, May 05, 2012

Making a case for creating Open Educational Resources for use in Higher Education

To set the scene we'll start with a useful and pragmatic definition of Open Educational Resources from Stephen Downes (although he does not support the idea of an 'official' definition) – Read more here http://halfanhour.blogspot.co.uk/2011/07/open-educational-resources-definition.html
"Open educational resources are materials used to support education that may be freely accessed, reused, modified and shared by anyone."

Background

Inspiration for this post was attendance at the one day MEDEV workshop From curiosity to confidence: sharing what it takes to ‘go open’ with learning and teaching resources. Keynote speaker Kieran McGlade (Queen’s University Belfast) kicked off proceedings with an Introduction to open educational resources (OERs) and open educational practice (OEP). Megan Quentin-Baxter (MEDEV) and Jane Williams (University of Bristol) prompted useful discussion not just on copyright issues in relation to OERs but also on the very important ethical question of consent (i.e consent of lecturers, participants and patients for the re-use and distribution of OERs).

Brigham Young University faculty survey seeks to advance open education through academic libraries
Image Courtesy of opensourceway under the CC 2.0 SA licence

Sangeetha Rajoo and Caesar Wek (Both, Queen Mary University London) demonstrated the good work that they have done creating open educational resources and outlined their approaches and the issues that they have come across. In the final session of the morning Paul Scott (Hull York Medical School) gave an important insight into institutional approaches to developing OERs, emphasizing the importance of planning early from the beginning to ensure all resources do not infringe copyright and that consent is obtained before the creation of resources.

Suzanne Hardy (MEDEV) rounded off the session in the afternoon with many practical tips and advice on tools to use that will aid the development of OERs.

Further Reading

With a business hat on one of the prime motives quoted to justify the creation of OERs is that it is good marketing for the institution and it allows the institution and/or the individual to showcase their skills and knowledge, enhance their reputation and encourage students onto the standard regular courses and programmes that are offered. This may be so, however I have not been overly convinced about the cost effectiveness and sustainability of this approach for the institution and the effectiveness of OERS in being re-used and re-adapted for teaching and learning.

To help improve my understanding and come to an effective rationale to make the case for creating Open Educational Resources for use in Higher Education and beyond I’ve also recently read two articles on the topic. i) Positioning the OER Business Model for Open Education and ii) Extending the Territory: From Open Educational Resources to Open Educational Practices.

Accepting there are merits in the motivation mentioned above, for me it is not yet clear if this alone is a strong enough basis for a Strong OER commitment that fits into the overall strategy of a Higher Education institution and further how it fits in with the notion of still trying to gain competitive advantage over other Institutions who you are collaborating with in a spirit of altruistic educational endeavour. I probably need to examine in more detail the philosophy and ‘success’ of an institution like MIT with their renowned open courseware (OCW) programme (See MIT’s Presidents message about OCW), but attendance at the workshop combined with the further reading has helped me to crystallize a number of reasons that will help make the case for institutional backing for creating and developing open educational resources for use in Higher Education.

The First Argument

The first argument is that as a leading educational institution it is in the public good to share knowledge globally for the benefit of citizens of the world. To quote Susan Oldfield from the MIT OCW website “We do not yet know the full potential of OCW and its ultimate impact on global education. But it is clear to us that by thinking of knowledge as a public good for the benefit of all, and acting on this philosophy through OpenCourseWare, we can make a difference”.

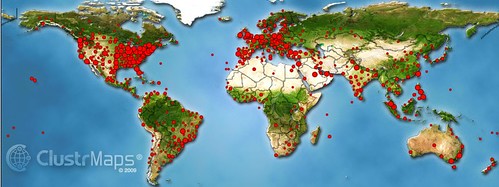
Clustr Map for the Global Education Collaborative Community 11.28.2009 Image Courtesy of elemenous under the CC 2.0 SA licence


The early pioneers had an obvious passion for this and for many others they may just need some encouragement by other practising colleagues to convince them that contributing to global education is a wonderful thing.

To stiffen this mentality up it could be argued especially in the UK that given that lecturers and the institution are funded in large part by the public purse then lecturers are honour bound to spread their educational resources to the wider public.

Belief in the value of Open Educational Practice is the Key

Open Educational Practice when defined is often closely intertwined with Open Educational Resources, for me it is much wider than that. It is sharing and engaging widely and openly. It involves network learning and making use of all the wonderful social networking tools at our disposal to engage and connect with other people on a local, national and global basis. This video Community as Curriculum and Open Learning from Dave Cormier and this video Networked Student from Wendy Drexler best help to explain the concept.

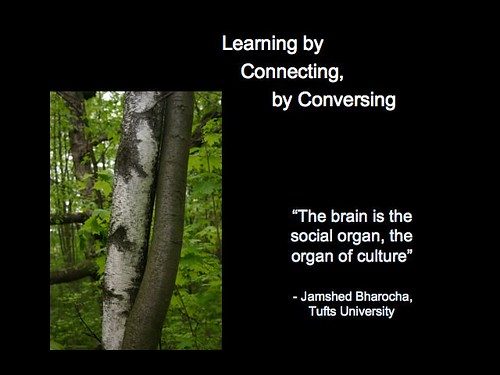
UNH Talk Slide17 Image Courtesy of bgblogger under the CC 2.0 NC licence

Many individual lecturers in Higher Education especially at this time may question the mentality of embracing an open educational ethos and making resources that they create free, open and available for use and re-use by both teachers and students. To persuade unconvinced staff, to me it is essential that staff first buy into the notion of open educational practice. Once convinced, the notion of creating open educational resources will naturally become part of the open educational mindset.

Having myself been exposed to the open educational concept primarily through the great connectivist movement (see what is connectivism?)  my own sharing behaviour has been changed as I have been convinced by the enlightened early believers of the merits  of being an active participant in a wider national and international open learning community. The massive educational benefits I have freely received has encouraged me to contribute my own knowledge skills, ideas and opinions freely and openly thus playing my part in helping others, as others have helped me.

We need to emphasize that the materials are free and open in the context of education and are for non-commercial gain with you the creator maintaining control of all aspects of copyright including accreditation and sharing and re-use restrictions. This is ideally done using a Creative Commons license, but part of the preparation will include ensuring all material used has no copyright restrictions and that ethical, moral and legal consent for the inclusion of third parties in for example video resources is obtained.

Mitigating the effort of creating OERs

I question the cost effectiveness and the sustainability because it is not monetarily cheap to produce sophisticated specific resources or timewise cheap to adapt and prepare materials for use as an OER. However, if you are persuaded by the need to act in the public good, the obligation to make the most of your publicly funded time or you really can see the massive advantages of giving and receiving open educational resources and sharing knowledge and ideas as part of a global education community, then with some preparation and clear intent at the outset the job of creating OERs for use in your regular teaching and learning and then for further sharing and re-use can be made easier in a number of ways. Consider the following:

1. Within most Higher Education institutions there will be an OER Champion. It will be important to work with them and within your own institutional guidelines and policies. There are many legal and ethical issues to consider. Your OER Champion mindful of the circumstances at your institution will be able to offer time saving guidance and advice and possibly a clear checklist of things you need to do to prepare resources for open educational use.

2. Addressing key legal and ethical issues mentioned above before starting development of an OER will include i) ensuring that you are the copyright holder or that you have copyright clearance to offer certain material  within an OER ii) clearly stating the terms upon which you as copyright holder will allow the OER to be used, shared or re-used (a creative commons license makes this a simple process) and iii) gaining consent of participants in OERs before creation of said OERs (and with a clear explanation as to its purpose and use).

3. With an OEP mindset you’ll be more inclined to take advantage of OERs produced by others. Your eyes will be opened to a wealth of material freely available. This will inspire you to understand what is possible and encourage you to contribute yourself when the time is right.

4. There are many free tools out there to help not only the development of OERs but resources for your own regular teaching and learning. Once again opening your mind to these tools will further encourage you to understand that with good planning and preparation making resources available freely and openly for use and re-use although requiring some effort may not be too onerous a task.

Practical Help

During the MEDEV workshop Suzanne Hardy signposted some great tools for sourcing open educational resources during the workshop.  Some useful tools highlighted are listed here.

OERs in Action

Here are a couple of useful examples of OERs that i am familiar with:

And Finally Dissemination

There will be many OER Repositories such as Jorum to upload your resources too, but if you want to try and spread the word about your OERs far and wide this search engine optimisation guidelines article by Dr Vivien Rolfe and Dr Simon Griffin uses the DMU Sickle Cell Anaemia project mentioned earlier to illustrate a step by step approach to gaining maximum exposure for your resources.
PS:If you don't know where to start with connectivist teaching and learning, contact me and i'll suggest a suitable starting point.

Sunday, January 29, 2012

Articulate Presenter: Adding Voiceover Sound

In a previous post we looked at how to include voice-over sound in PowerPoint presentations. For those that also have access to the Articulate Presenter PowerPoint Add-In there is the opportunity to add sound to an enhanced presentational format.

This two part series demonstrates how add to add voiceover sound to Articulate presentations and highlights a few basic points about the files and folders that are generated.

Part 1: Adding Voiceover sound to Articulate Presenter - Adding Sound, Previewing and Publishing


Part 2: Adding Voiceover sound to Articulate Presenter - Files, Folders and External Sound